Table of Contents
Before we start the installation of the Posh No Limit CDI, listed are the prior modifications on this 50cc Honda Ruckus. We started off with the Polini Variator Speed Control, which in our opinion should be one of the very first modifications to do for your scooter. It will give you more acceleration and top speed. We have seen it go from 43mph bone stock to around 47mph with this upgrade only, we even hit around 52mph going downhill.
Next, we installed a Yoshimura TRC Carbon Fiber Exhaust. This exhaust gave us a great sound along with a few additional horsepower. With a high-temperature carbon fiber canister, this exhaust looks stylish and it weighs less than the OEM exhaust so it reduces the overall weight of the scooter. With the new Yoshimura exhaust we can now hear factory rev-limiter. With just the Polini Ruckus Variator mod only, we weren’t sure if we ever saw the stock rev limiter as the stock exhaust was too quiet. Now we can hear the engine bouncing off the rev-limiter daily and we had to install the Posh No Limit CDI. The benefit of the Honda Ruckus Posh CDI unit is that it will remove the rev-limiter and advance the ignition timing for better acceleration.
Tools Needed:
- 10mm & 12mm sockets and ratchet
- Phillips screwdriver
- Wire stripper & crimper
- Pliers
- Electrical Ring Connectors
- Soldering Iron
- Solder
- 4 zip ties
Preparation:
- Remove the seat frame by unbolting the six bolts on the frame, there are three on each side
- Unscrew the four screws on the battery box and remove it, 2 on each side
- Unbolt the eight bolts holding the floor down, 4 bolts with the 10mm and 4 with the 12mm
- Remove the two screws in the front, near the front wheel
- Remove the two screws holding the metal plate clamp in place
- Remove the battery box, floor, and seat frame and set them aside
Wiring the Unit:
- Unplug the battery
- Locate the ignition coil and plug in Posh CDI Sub-harness (Figure 1 & 2)
- Remove the yellow with black stripe line from the ignition coil
- Plug in the yellow and black line from the Posh CDI harness back into the coil, this is bypassing the coil wiring with the CDI wiring
Figure 1
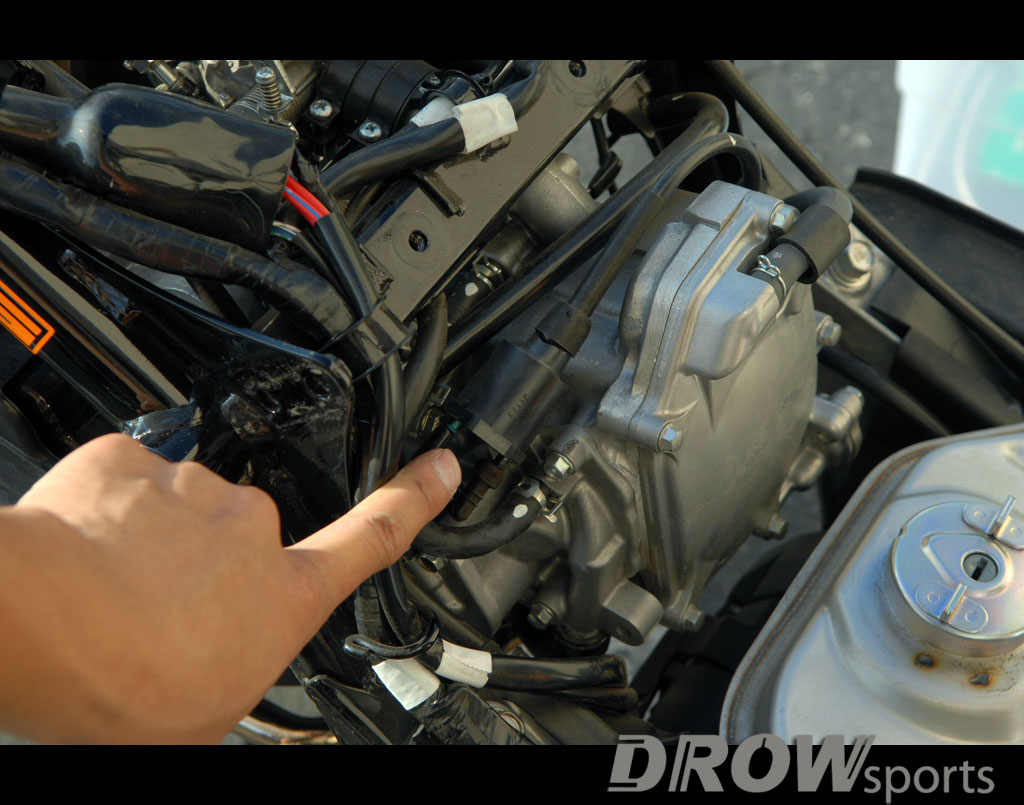
Honda Ruckus Ignition Coil located under floorboard
Figure 2

put in Posh CDI Sub-harness into ignition coil
5. Plug in the blue Posh CDI wire into the OEM blue and yellow wire located in the battery box (Figure 3)
6. Locate the Ruckus relay block above the battery. (Figure 4)
Figure 3
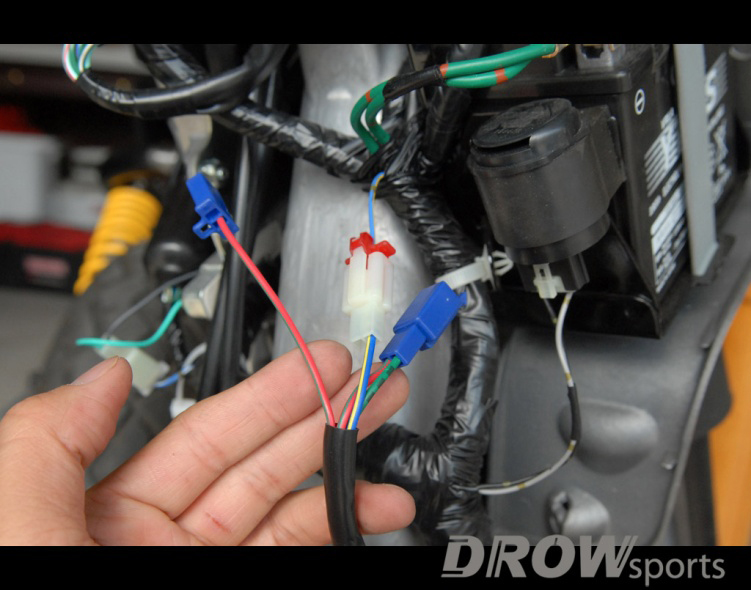
ruckus harness to posh cdi sub-harness
Figure 4
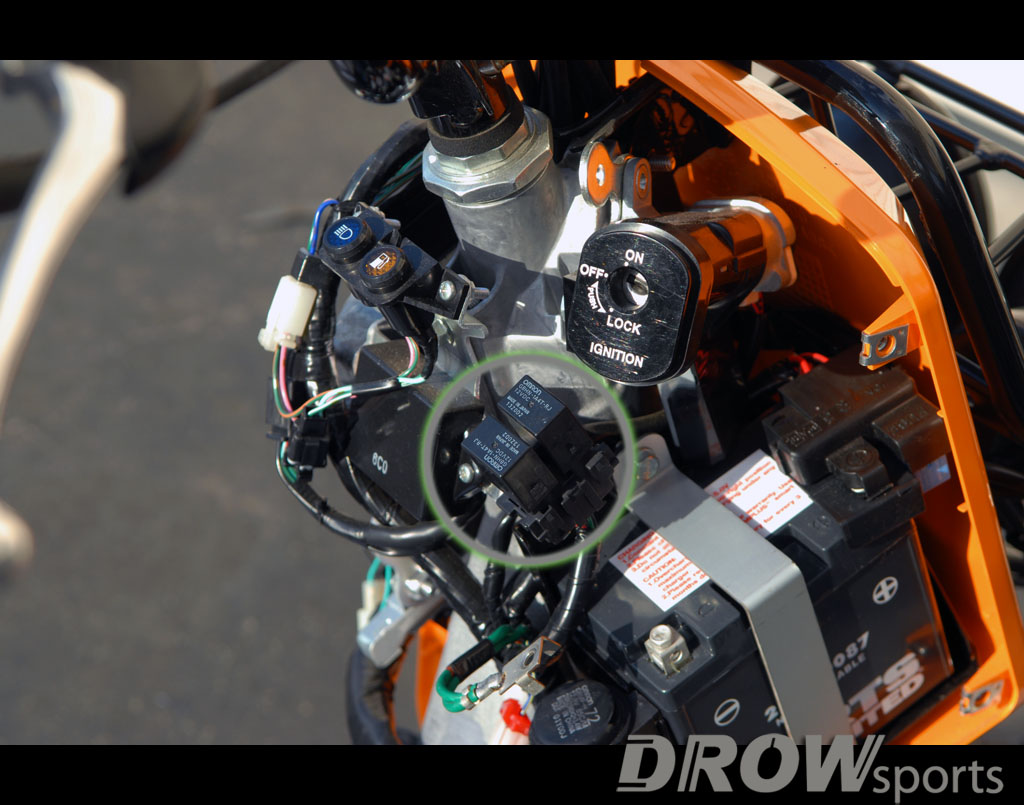
ruckus relay for power souce
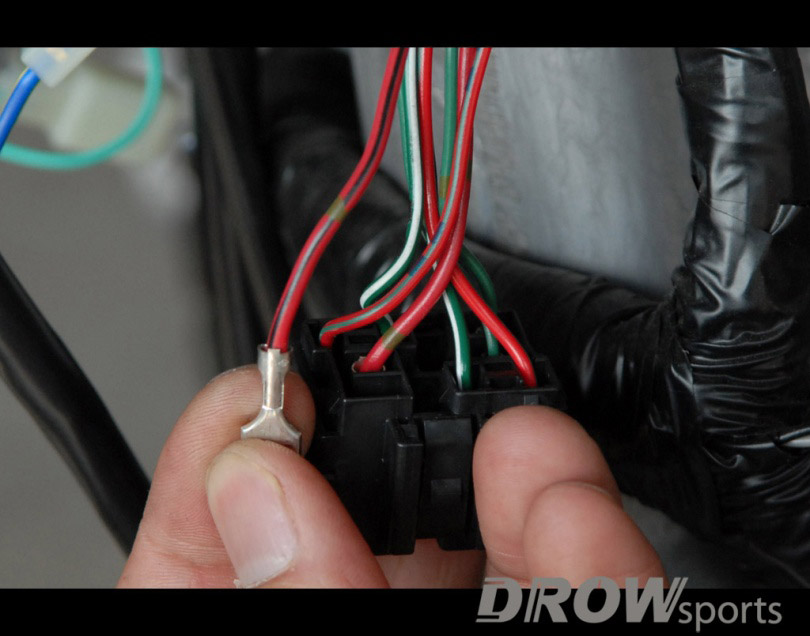
7. Locate the red with black stripes wire (+) and remove the relay connected to that plug. Using a small pick to remove the pin out of the plug. (Figures 5 & 6)
Figure 5
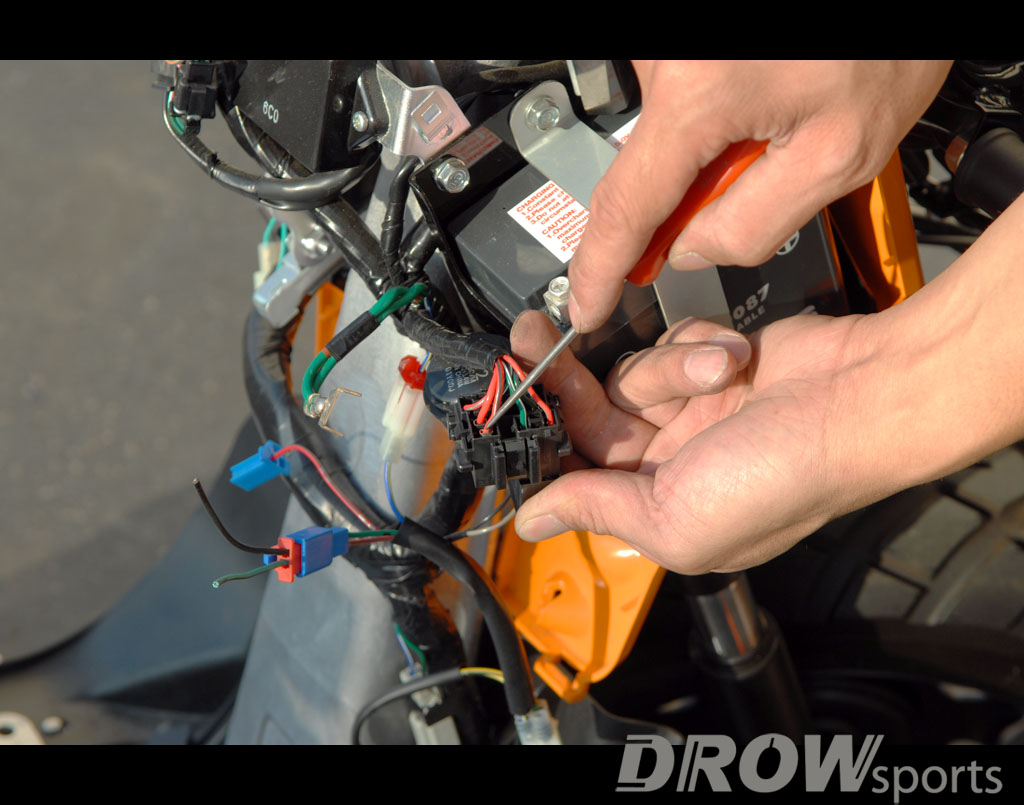
locate red wire with black stripe
Figure 6
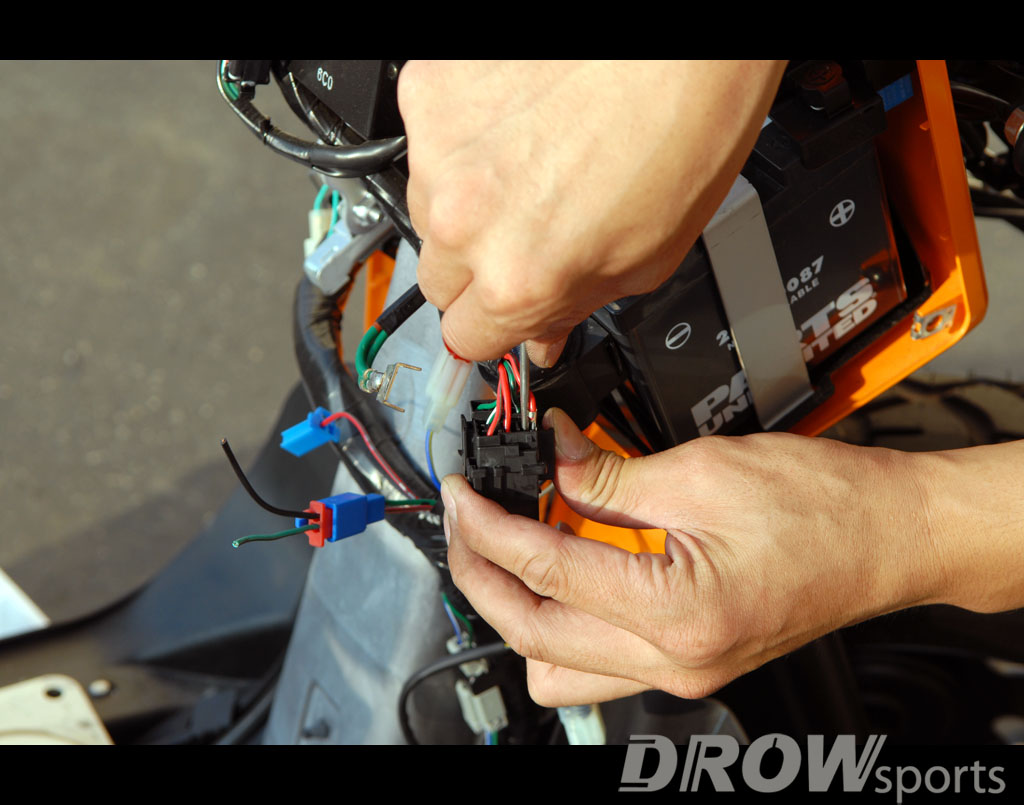
remove the relay and by using a thin pick, you can de-pin the relay wire
8. Solder the positive wire from the Posh CDI to the red/black wire you just un-plugged for the relay. (note: we used a extra plug we had laying around to solder on the relay wire) (Figures 7 & 8)
Figure 7
power source for the CDI
Figure 8
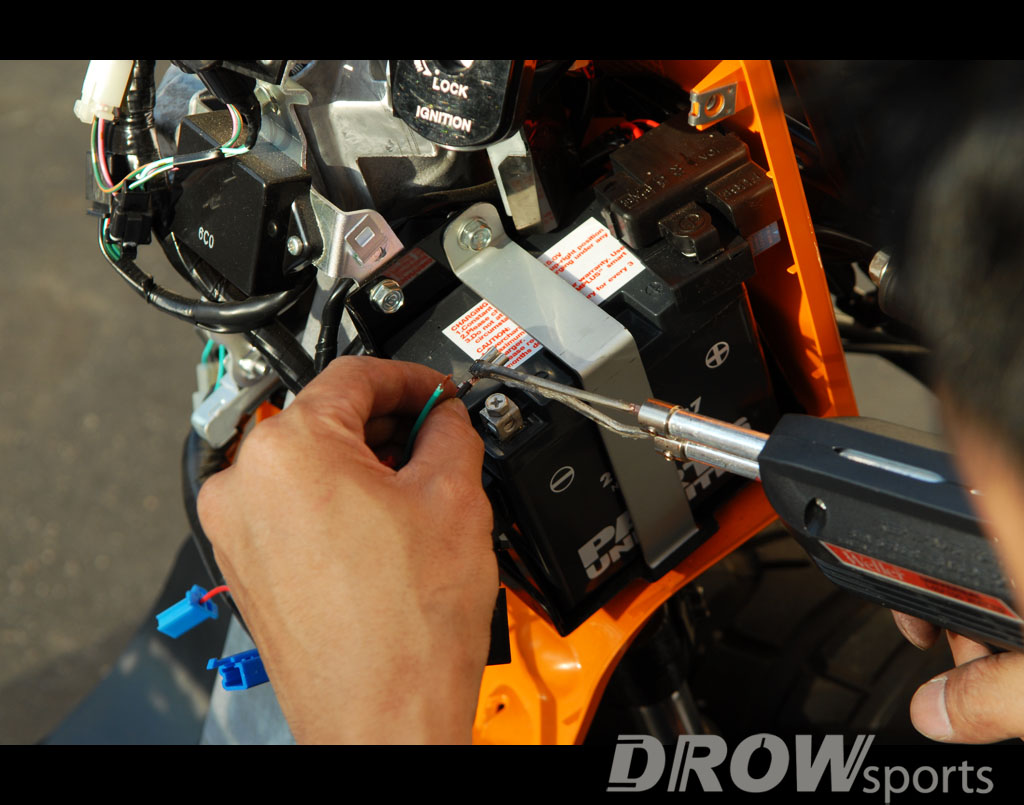
solid is the best way to ensure a good connection
9. Once soldered, insert the red and black wire back into the block. The positive connection is now done.
a. Tug on the wire to make sure it’s secure
10. Using a ring connecter, crimp and solder the ground wire onto the connector.
Figure 9

Ruckus Posh CDI Ground
Figure 10
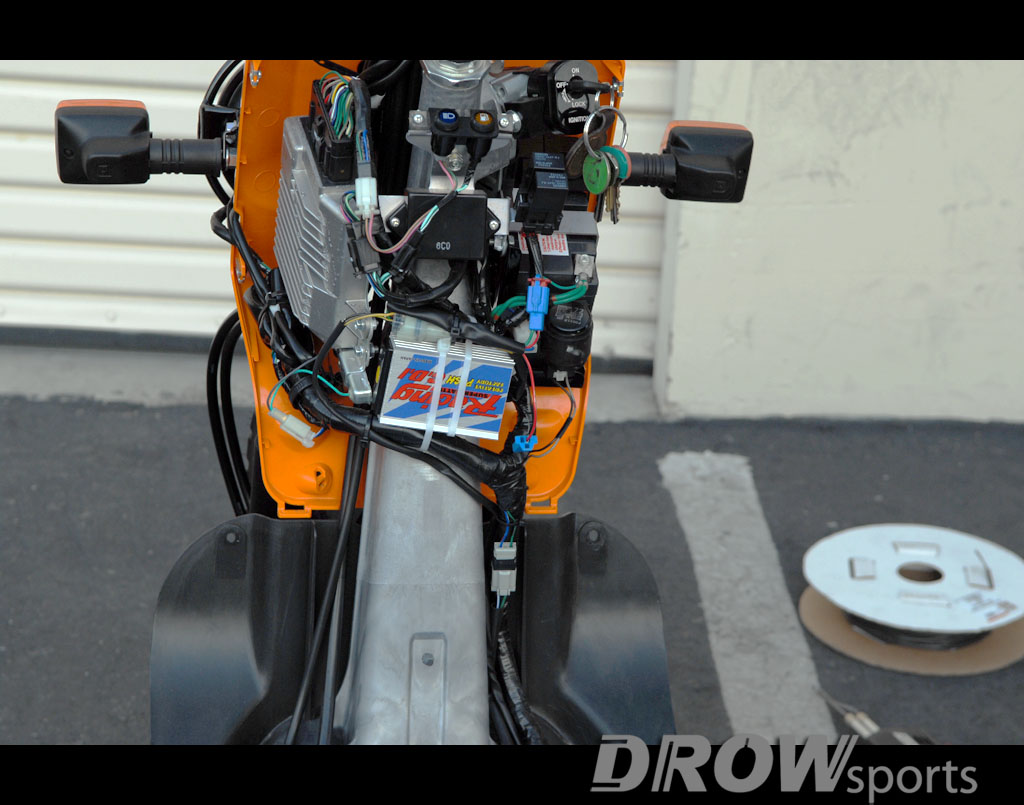
completed install, do a test run before putting the battery box back on
11. Plug in the relay back into the relay block, wiring is now complete
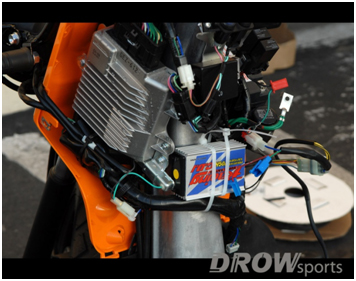
Mounting the CDI Unit:
12. Apply the sticky pad onto the back of the CDI unit
13. Stick the CDI unit onto the metal centerpiece adjacent to the battery
a. Zip tie it to the OEM wires to keep it in place
14. Plug in the CDI unit
15. Reconnect the battery
16. Put everything back on, i.e. battery box, floor, seat frame, and you have installed your Honda Ruckus Posh CDI unit.

