Assumption is such a bad thing. It can make you look like a jerk, an idiot, or it can lead to some terrible, expensive headaches. When it comes to Ruckus and Zuma Performance Parts, assumption will lead to a broken bike and expensive repairs the moment you fire up your Scooter. What can you do to prevent this? What steps must you take to ensure proper fitment of your parts? This blog post will be part one and will help you figure that out!

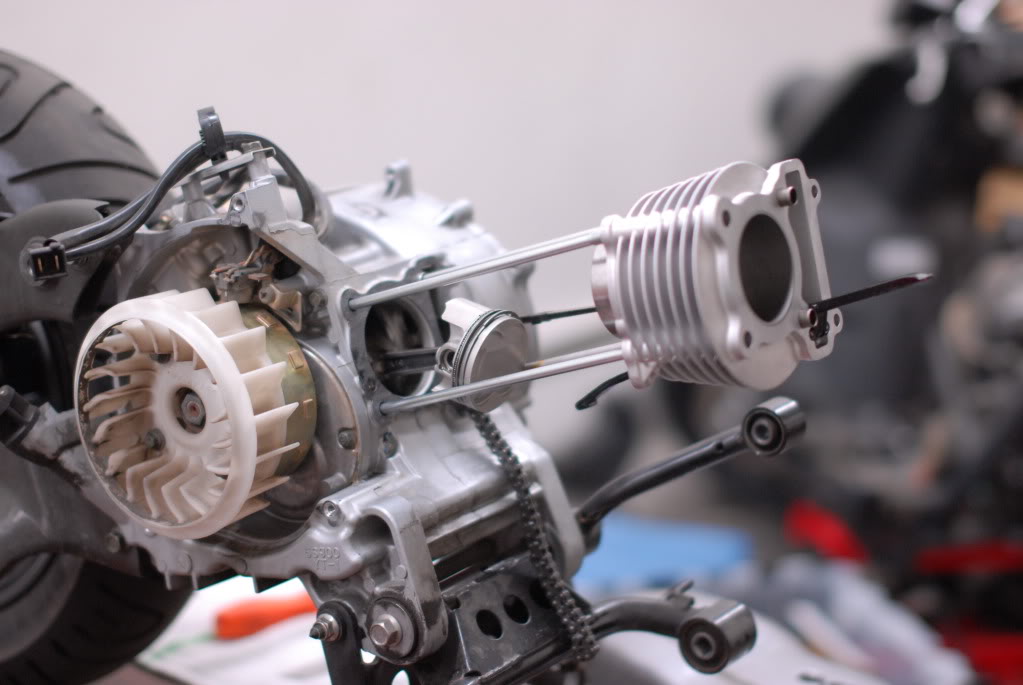
So, you want to increase the bore, stroke, or even increase both to your scooter engine? Well, there are a few steps you must take before you just throw those parts in and wait for the sound clapping piston skirts and metal shrapnel. While the manufacturers do their best to make sure that their parts will work in the engine they intended, there is always the possibility that something may be different with your engine. There is also still the possibility that a bad part made it past Quality Control, too. Ruined engines can be the worst part about the Scooter Performance experience and that can really make someone never try again. However, if you do ensure that your parts fit, you’ll never have a problem unless you create one. Let’s start with the first major part most enthusiasts go for to gain more power in the engine, the piston bore size.
Upon receiving your cylinder kit, you should take all the parts out and check over each one. Make sure there are no dents or deep scratches in the cylinder walls. The light cross hatch scoring you see is normal and essential, as it is what allows the oil to coat the cylinder for piston movement. The intersection angle of that cross hatch is also important, as 45 degrees is considered the requirement by most engine builders. Too steep of an angle and there won’t be enough oil to coat the cylinder, too flat and there will be too much oil and oil consumption will occur.
If you are using a two-stroke engine, check the cylinder near the intake and exhaust ports. If you see flaking or even chips missing from the cylinder wall near those ports, you need to send it back for a new cylinder. Those chips/cracks can damage the piston, not to mention it can screw up your port timing. The next thing to do is measure your cylinder bore and piston diameter. This will check for three things; the correct bore of the cylinder, the correct size of the piston, and the piston to cylinder clearance. The proper way to check cylinder bore is by using a bore gauge and a micrometer. A bore gauge is a device that telescopes out and locks in place so that you can use your micrometer to measure a bore. Check the diameter of the piston at the top of the cylinder, then turn it 90 degrees and check that. Then move the gauge down to the middle of the cylinder and check the same way. The reason you are doing this will ensure that the cylinder is round all the way through the stroke of the piston. Take those measurements and check them against the tolerance that the manufacture of the cylinder recommends. One last note, you can use a dial bore gauge and it is accurate, but a bore gauge and micrometer is far more accurate.
Next, you want to check the diameter of your piston using a micrometer and check it 90 degrees from your initial measurement. Again, check this against your piston manufacture’s recommended measurements. From those two measurements, you can now get your piston to cylinder wall clearance. You take the cylinder wall measurement and subtract it from piston measurement to get your wall clearance. This clearance is very critical because it is the maximum your piston and wall can expand before contact is made and engine lock up occurs. The tolerance is usually determined by the piston manufacturer as it is the piston that usually sees the most expansion. If your piston and cylinder were bought as a set, that manufacturer will give you that tolerance. If you do not have a micrometer, you can measure piston to wall clearance by using feeler gauges. The spot you measure using feeler gauges will vary from manufacturer to manufacturer, as well as the tolerance size.
The last part on your piston to measure is your piston ring gap. This is done by taking a piston ring and fitting it in the cylinder, then checking the ring gap with a feeler gauge. When you place the piston rings into the cylinder, do not slide it down the cylinder! Squeeze the piston rings one at a time and place them in the cylinder. You can use the piston to ensure they are sitting level, but do not slide it all the way in as doing so may ruin the cross hatch pattern of your cylinder wall. The piston ring gap is determined by the piston or piston ring supplier, so you will have to consult with them on proper ring gap.
